The car tint removal cost varies widely. It can range from a completely free DIY tint removal job to upwards of $200 or more for professional window tint removal, depending on several factors. This article will break down the different methods and associated costs for removing window tint from your car.
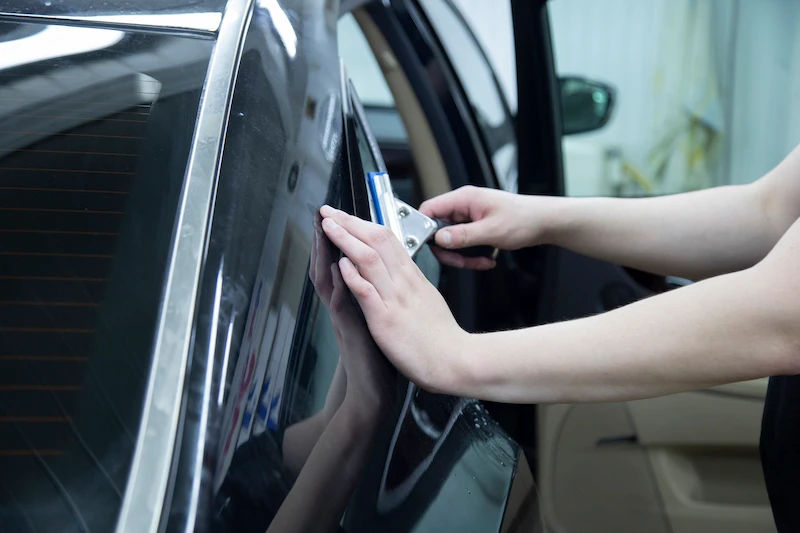
Image Source: thetintguy.com
Factors Influencing Auto Glass Tint Removal Pricing
Several things affect the price of removing window tint. Recognizing these elements helps you anticipate expenses, whether you choose to do it yourself or hire a pro.
- Number of Windows: Naturally, removing tint from all windows will cost more than just a single window.
- Tint Type and Quality: Cheaper tints often use weaker adhesives that are harder to remove. Higher-quality films might come off cleaner.
- Tint Age: The older the tint, the harder it is to remove. Sunlight and heat bake the adhesive, making it brittle and stubborn.
- Vehicle Type: Larger vehicles, with more windows or more complicated window shapes, might incur higher labor costs.
- Condition of the Tint: Window tint bubbling repair or heavily damaged tint might require extra care and time to remove. This drives up the price.
- Geographic Location: Labor rates differ between cities and regions.
- DIY vs. Professional: DIY tint removal saves on labor costs but risks damaging the window or leaving behind adhesive residue removal.
DIY Tint Removal Methods and Associated Costs
Can I remove the tint myself? Yes, you absolutely can! DIY tint removal is possible, but requires patience and care. There are several approaches, each with its own cost implications:
1. Solar Method (Bag and Sun)
This is often the cheapest and simplest DIY method.
- How it Works: Cover the window exterior with a black trash bag, trapping heat. The heat softens the adhesive, making it easier to peel the tint.
- Cost:
- Trash bags: $5-10
- Spray bottle: (If you don’t have one) $5
- Soapy water: $2 (Dish soap)
- Razor blade or plastic scraper: $5-10
- Adhesive residue removal: $10-20 (Goo Gone, WD-40, etc.)
- Total Estimated Cost: $27-45
- Pros: Low cost, simple.
- Cons: Time-consuming, can be ineffective on old or stubborn tint, requires direct sunlight.
2. Heat Gun Tint Removal
A heat gun tint removal can be faster and more effective than the solar method.
- How it Works: Use a heat gun to gently heat the tint, softening the adhesive as you peel.
- Cost:
- Heat Gun: $20-50 (if you don’t own one)
- Razor blade or plastic scraper: $5-10
- Soapy water: $2 (Dish soap)
- Adhesive residue removal: $10-20 (Goo Gone, WD-40, etc.)
- Total Estimated Cost: $37-82
- Pros: More effective than the solar method, faster.
- Cons: Risk of damaging the glass with excessive heat, requires caution.
3. Steamer Tint Removal
A steamer tint removal is another way to introduce heat and moisture.
- How it Works: A steamer applies hot steam to loosen the adhesive.
- Cost:
- Steamer: $25-75 (if you don’t own one; clothing steamers work)
- Razor blade or plastic scraper: $5-10
- Soapy water: $2 (Dish soap)
- Adhesive residue removal: $10-20 (Goo Gone, WD-40, etc.)
- Total Estimated Cost: $42-107
- Pros: Less risky than a heat gun, effective.
- Cons: Steamer purchase required if you don’t own one.
4. Ammonia Tint Removal
Ammonia tint removal can be effective, but requires significant safety precautions. Use extreme caution and wear appropriate protective gear (gloves, mask, eye protection) when working with ammonia.
- How it Works: Spray an ammonia solution between the tint and glass (usually inside a trash bag sealed to the window), which helps release the adhesive.
- Cost:
- Ammonia: $5-10
- Spray bottle: (If you don’t have one) $5
- Trash bags: $5-10
- Razor blade or plastic scraper: $5-10
- Soapy water: $2 (Dish soap)
- Adhesive residue removal: $10-20 (Goo Gone, WD-40, etc.)
- Total Estimated Cost: $32-57
- Pros: Can be very effective.
- Cons: Strong odor, health hazards if not handled properly, requires excellent ventilation.
DIY Tint Removal Cost Comparison
| Method | Estimated Cost | Pros | Cons |
|---|---|---|---|
| Solar Method | $27-45 | Low cost, simple | Time-consuming, can be ineffective on old or stubborn tint, requires direct sunlight |
| Heat Gun Removal | $37-82 | More effective than the solar method, faster | Risk of damaging the glass with excessive heat, requires caution |
| Steamer Removal | $42-107 | Less risky than a heat gun, effective | Steamer purchase required if you don’t own one. |
| Ammonia Removal | $32-57 | Can be very effective. | Strong odor, health hazards if not handled properly, requires excellent ventilation. |
Professional Window Tint Removal: What to Expect
While DIY methods can save money, professional window tint removal provides convenience and reduces the risk of damage. What factors contribute to the cost?
Average Professional Tint Removal Costs
The national average for professional window tint removal ranges from $50 to $200, depending on the factors mentioned earlier. Here’s a general guideline:
- Single Window: $25 – $50
- Two Front Windows: $50 – $90
- Full Car (all windows except windshield): $100 – $200+
These prices are estimates and can vary significantly based on your location and the specific shop.
What Affects Professional Pricing?
- Shop Reputation and Experience: Established shops with experienced technicians usually charge more.
- Type of Tint: Some tints are notoriously difficult to remove, requiring more labor and specialized techniques.
- Adhesive Removal: The extent of adhesive residue removal necessary can significantly impact the cost. If the adhesive is baked on and stubborn, expect to pay more.
- Warranty: Some shops offer a warranty on their removal service, ensuring that any remaining adhesive or damage will be addressed.
Benefits of Professional Removal
- Expertise: Professionals have the knowledge and tools to remove tint safely and efficiently.
- Time Savings: What might take you hours can be completed by a professional in a fraction of the time.
- Reduced Risk of Damage: Professionals are trained to avoid damaging the glass, defroster lines, or other components.
- Proper Adhesive Removal: They have specialized products and techniques for thorough adhesive residue removal, leaving your windows clean and clear.
- Warranty: As mentioned before, some shops offer warranties.
Comparing DIY vs. Professional Removal
Choosing between DIY and professional removal comes down to balancing cost, time, and risk.
| Feature | DIY Removal | Professional Removal |
|---|---|---|
| Cost | Lower initial cost | Higher initial cost |
| Time | Time-consuming, potentially several hours | Faster, typically 1-2 hours |
| Risk of Damage | Higher risk of scratching glass or damaging defrosters | Lower risk of damage |
| Adhesive Removal | Requires effort and may not be perfectly clean | More thorough adhesive residue removal |
| Convenience | Inconvenient, requires effort and preparation | Convenient, minimal effort required from your end |
| Expertise | Requires research and learning | Performed by trained and experienced technicians |
| Tools & Equipment | You must supply or purchase tools | Professionals have all the necessary tools and supplies |
Step-by-Step Guide to Removing Tint Yourself (Solar Method)
If you choose the DIY route, here’s a detailed guide using the solar method:
- Gather Your Supplies:
- Black trash bags
- Spray bottle
- Dish soap
- Razor blade or plastic scraper
- Goo Gone or similar adhesive residue removal product
- Clean cloths or paper towels
- Prepare the Window: Clean the exterior of the window with soapy water.
- Apply the Trash Bag: Cut the trash bag to fit the window and tape it securely to the exterior. Ensure the black side faces outward to absorb sunlight.
- Wait: Let the sun heat the window for at least an hour, or longer if the tint is old or the weather is cool. The goal is to soften the adhesive.
- Peel the Tint: Starting at a corner, carefully peel the tint away from the glass. Pull slowly and steadily. If the tint tears or becomes difficult to remove, reapply heat.
- Remove Adhesive Residue: After removing the tint, spray the remaining adhesive with Goo Gone or a similar product. Let it sit for a few minutes to soften the adhesive.
- Scrape and Clean: Use a razor blade or plastic scraper to carefully remove the softened adhesive. Be careful not to scratch the glass.
- Final Clean: Clean the window thoroughly with glass cleaner to remove any remaining residue.
Troubleshooting Common Tint Removal Problems
- Tint Tearing: If the tint tears easily, it’s likely not heated enough. Reapply heat and try again.
- Stubborn Adhesive: Some adhesives are particularly stubborn. Try using a stronger adhesive remover, letting it sit longer, or using a more aggressive scraper (while being careful not to scratch the glass).
- Damaged Defroster Lines: Be extremely careful around defroster lines. Use a plastic scraper instead of a razor blade to avoid damaging them. If you do damage them, defroster repair kits are available.
- Window tint bubbling repair: If you are only trying to repair bubbling, consider carefully cutting the bubbling section out with a razor and reapplying a small patch. However, this may be visibly noticeable.
Maintaining Your Windows After Tint Removal
After removing the tint, it’s important to properly clean and maintain your windows:
- Clean Thoroughly: Use a high-quality glass cleaner to remove any remaining residue or streaks.
- Inspect for Scratches: Check the glass for any scratches or damage caused during the removal process.
- Consider Re-Tinting: If you liked having tinted windows, consider having them re-tinted with a new film. This can improve the appearance of your car and provide UV protection.
Deciding on the Right Course
- Assess Your Skill Level: Are you comfortable working with tools like heat guns and razor blades?
- Consider Your Time: Do you have the time and patience to dedicate to DIY removal?
- Evaluate the Tint Condition: Is the tint old, brittle, and difficult to remove?
- Weigh the Risks: Are you willing to risk damaging your windows to save money?
If you’re unsure or uncomfortable with any of these factors, professional removal is the best option.
FAQ: Frequently Asked Questions
- What is the best way to remove window tint?
- The “best” way depends on the tint’s age, your skill level, and available tools. The solar method is cheapest, while heat guns and steamers are more effective. Professional removal is the safest and most convenient.
- Can I use a hairdryer instead of a heat gun?
- A hairdryer can work, but it’s less effective than a heat gun because it doesn’t produce as much heat. It will take longer and might not be sufficient for stubborn tint.
- How long does it take to remove window tint professionally?
- Typically, professional removal takes 1-2 hours for a full car, depending on the number of windows and the condition of the tint.
- Who is the best choice for professional window tint removal?
- Research local shops, read online reviews, and ask for quotes. Choose a shop with experienced technicians and a good reputation.
- What causes window tint to bubble?
- Window tint bubbling is primarily caused by the adhesive breaking down due to heat, sunlight, and age. It can also be caused by improper installation.
- Does removing window tint damage the glass?
- If done carefully, removing window tint should not damage the glass. However, improper techniques or aggressive scraping can scratch the glass or damage defroster lines.
- How can I prevent window tint from bubbling?
- Use high-quality tint film, ensure proper installation, and park in shaded areas when possible.
Hi, I’m Luigi Smith, the voice behind carrepairmag.com. As a passionate car enthusiast with years of hands-on experience in repairing and maintaining vehicles, I created this platform to share my knowledge and expertise. My goal is to empower car owners with practical advice, tips, and step-by-step guides to keep their vehicles running smoothly. Whether you’re a seasoned mechanic or a beginner looking to learn, carrepairmag.com is your go-to source for all things car repair!